This post and the photos within it may contain affiliate links. If you purchase something through the link, I may receive a commission at no cost to you. Read my disclosure for more info.
Are you printing your own wedding invitations? Maybe you are sending out a birth announcement or holiday cards?
While many all-in-one design sites such as minted.com will design and print for you, some times you might have a digital file and need to get it printed yourself.
File setup for printing is easier than you think. And if you are working with a designer, it’s even easier, as they will do the work for you!
The first question I ask my clients is how they will be printing: Home, Copy Shop, or professional Online Printer.
This makes a difference in how the file should be setup.
Where you print determines the best file setup for printing
Home Printing
For smaller cards, like 3.5×5 you can fit 4 to a page.
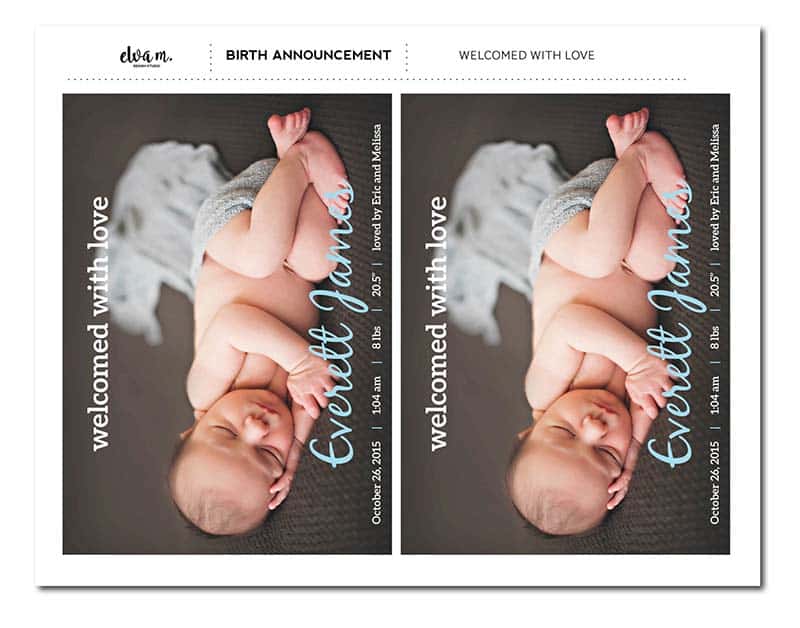
You’ll want to print on nice white card stock.
Copy Shop
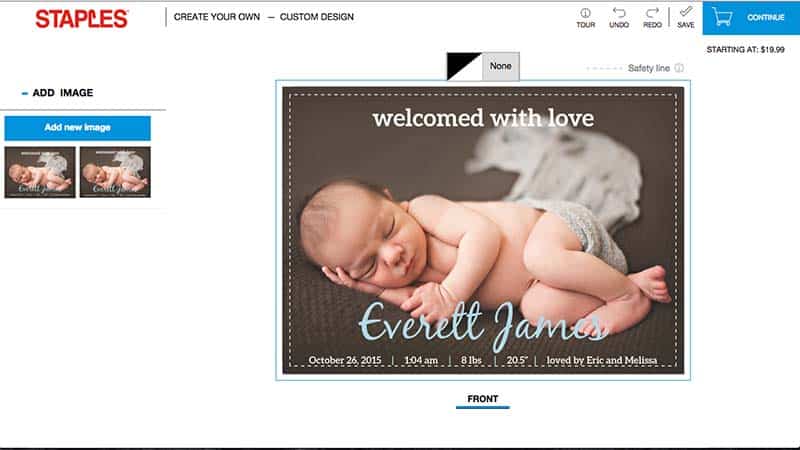
Some copy shops, like Staples, will have you upload your design to their online ordering website. There you can see how your image will fit in a “safe area”.
All text and design that you want printed needs to appear in this area or it could be cut off, as trimming isn’t always precise. You’ll see in the examples below, that this requires a slightly different file setup.
While it prints out fine at home in my 5×7 example; when I upload the standard 5×7 file to Staples, some of my text appears outside of this safety zone.
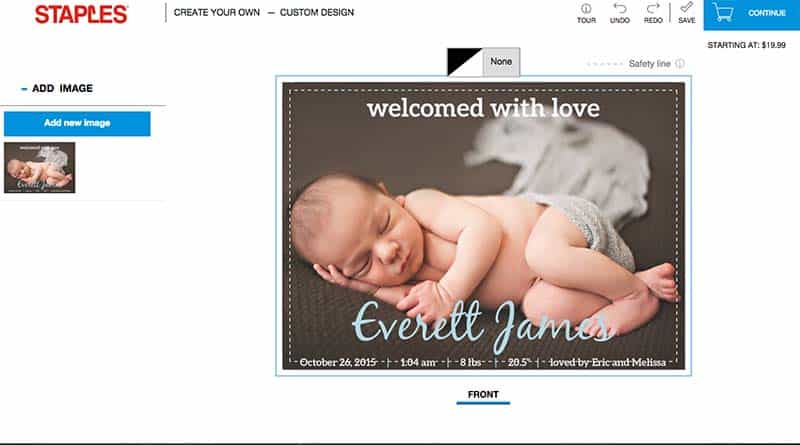
Here’s what you need to do. Most designers will add a .125″ bleed when the design extends to the very edge of the page.
The bleed allows the printer to print a little extra of the design and then trim down to the correct size, cutting off some of the design.
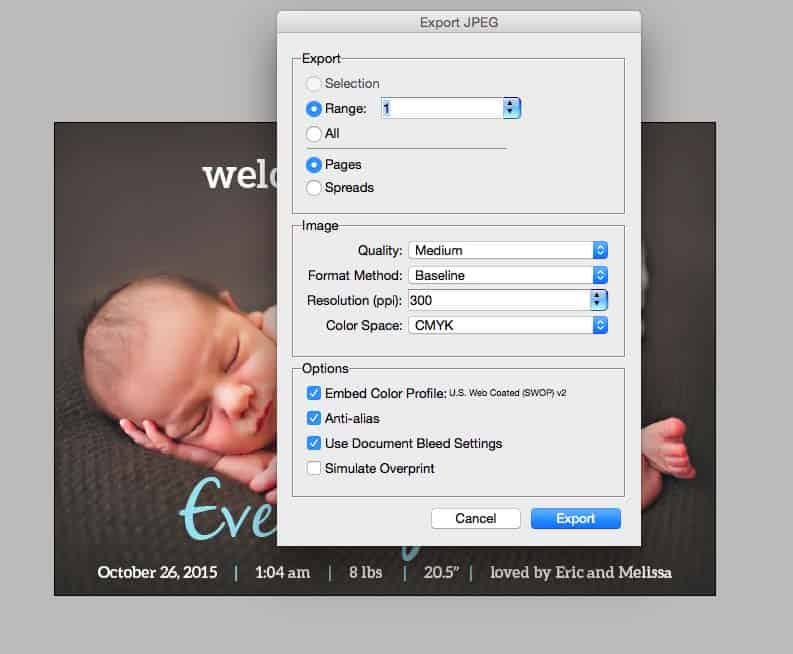
I exported my jpeg to use the “Document Bleed Settings,” which is setup with a .125″ bleed.
When I upload the file to Staples with the bleed, making my file 5.25 x 7.25″, it works! All of my text and design that I want to make sure prints is within the safety zone.
Online Professional Printer
Most online printers allow you to price out your piece with an online quote tool. You can choose your paper, color usage, quantity, and any extras (rounded corners, perforation, scoring, folds, etc).
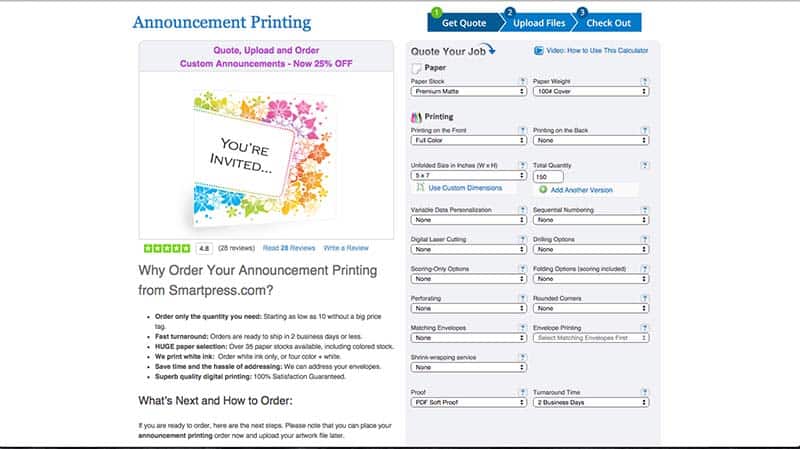
Once you choose your selections, you’ll upload your file and pay.
Typically you’ll receive an online proof back from the printer that will confirm the color settings (though note that monitors can skew the actual colors), and where the file will be trimmed.
Once you approve the proof, production of your order starts. Make sure you slow down and proof your work.
For the best quality print job, and a variety of paper choices, an online printer is your best bet. One of my favorite online printers is smartpress.com.
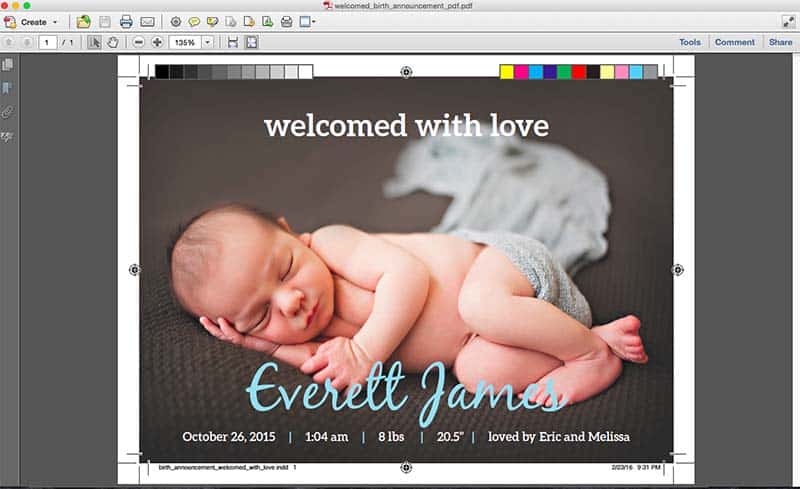
For these types of printers I recommend using a “Press Quality” pdf with Marks and Bleed settings checked. This will export the pdf at the highest quality possible, will add in the .125″ bleed, making it possible to print more of the design and then trim down, as well as additional professional print settings within the file.
Your file will look something like this:
Most online printers that I have worked with are very helpful when it comes to responding to questions about file setup and if they think something will print accurately.
Have a question? Send them an email or comment with your order!
Other considerations for printing:
- For most of these methods of printing, it’s important to set the color settings to CMYK unless the printer specifically mentions rgb. Walgreens and Miller’s Lab for instance should be in RGB.
- Export at the highest possible file type: Press Quality PDF or High Quality JPEG at 300dpi. To check if your file is high resolution, you can enlarge it to 400% in a file viewer like Adobe Reader. A 300dpi high resolution file will be clear even at 400%.
- Make sure fonts are embedded into the file. Some fonts have licensing restrictions that may prevent embedding.
Do you have any questions or file setup for printing tips to add? Comment below.

If you like what you see, please COMMENT, PIN, SHARE, or TWEET! I’d appreciate the love!

